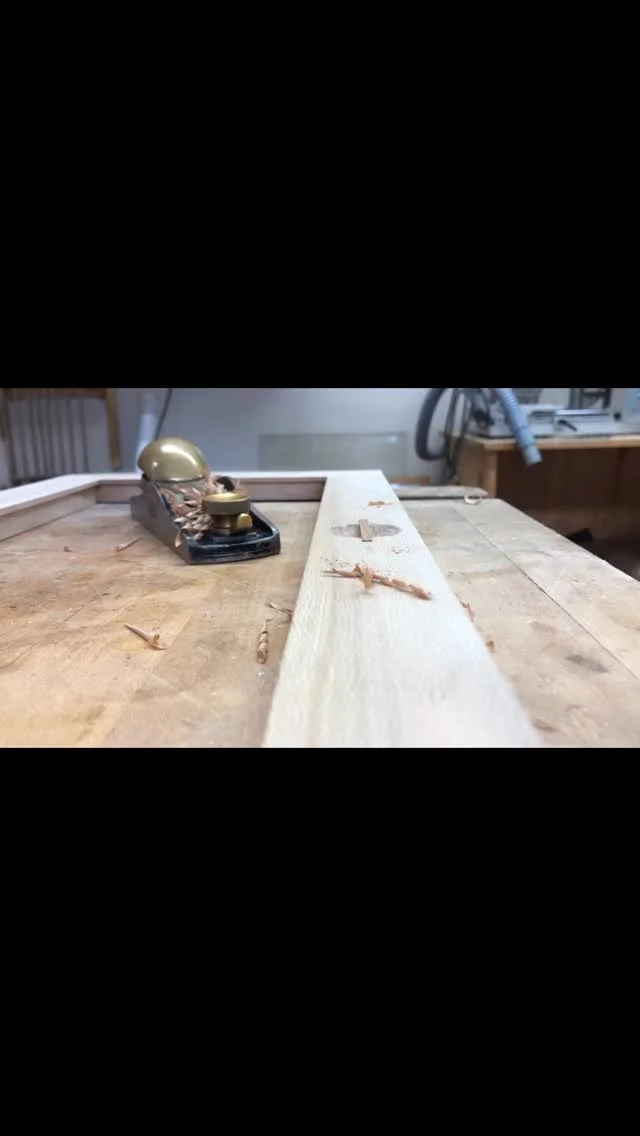
Joinery cut in stages. Large tenons cut in first pass and then smaller tenon cut in the middle only.
Design and construction go hand in hand when creating a custom piece. Well… a quick design lesson. It’s better to design without thinking about how you’re going to build it and then figure that part out later. So, what is it exactly you’re paying for with a custom piece? Design experience for one. With a custom piece design happens every step of the process. Design is often the thickness of a piece, a leg for example. However, there are limits, minimums and maximus that you need to understand so at that point a designer’s eye must have the ability to focus on construction practicalities that allow things to work. It might not be clear where this is leading at this point. Another way to say it is that there are a lot of ideas in a custom design, but all the details are not worked out when the building starts.

Final joinery with larger through tenons and smaller and thinner tenon in the center. The ends as well as cleaning up the smaller tenon had to be done by hand.

The finished through mortises and smaller tenon in between them.
The next step on the Butsudan is to figure out how the joinery will all work together. What does that design I was thinking of look like when built? The sides of the cabinet are mostly held together with a type of mortise and tenon joinery that is rock solid and allows for wood movement to happen. I’ve also designed some through, wedged tenons that would typically be used in a knock down type of construction. These offer additional strength but are not completely necessary. They are more part of the design and are offering visual interest on the sides of the cabinet. Would they ensure the cabinet stayed together without glue? An interesting mental exercise but not my goal here. I want everything to remain where I put it and glue will help me out.

Cutting the ears off the end of the board that are beside the large tenons.

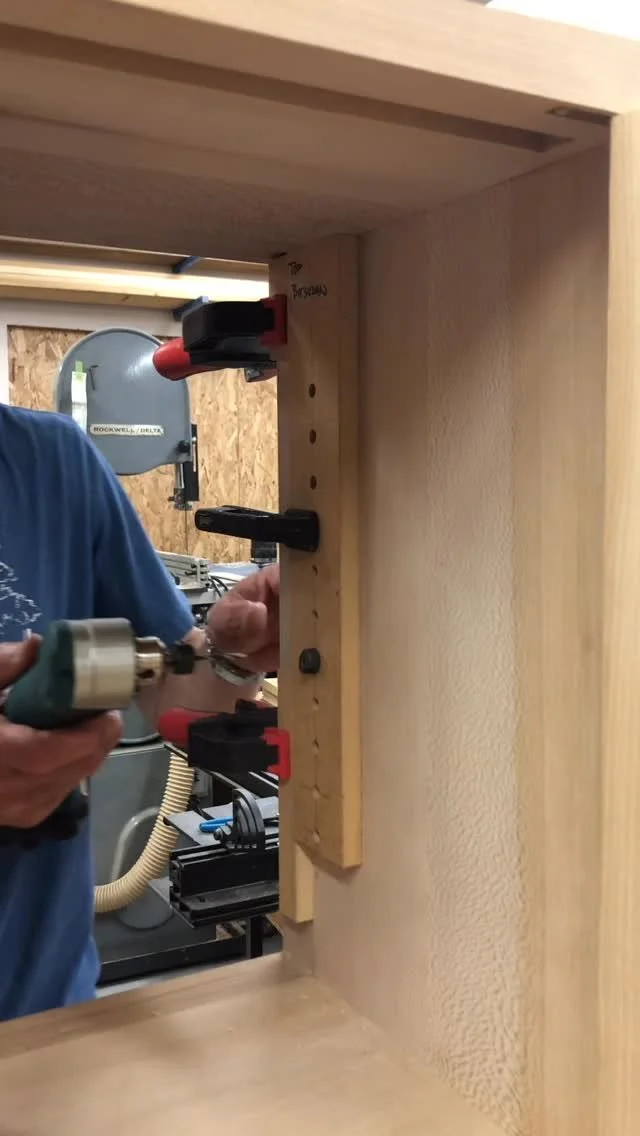
Finishing with a chisel
I did a few joinery tests out of poplar to help me see how I was going to cut some of the joinery on the final piece. The mortise and tenon joinery I’m using to hold the cabinet together is two different tenon lengths. A shallow tenon runs the length of the joint. That gives some gluing surface and allows the sides to horizontal members to stay flat. There are three longer tenons in this case. Two at the ends and one in the middle. They go much deeper and lock the joint together because there is a lot more glue surface with the longer tenons. The mortises are cut with a router set to a shallow depth and then a deeper depth. The tenons are then cut on a router table as one longer tenon the full length of the board. The tenon is then cut back on the band saw as well as finished by hand. And in this case the through mortises and tenons are cut independently of the work with the router.
With this combination of joinery, and with most joinery really, there is a combination of machine work and hand work. The machines often get you close or get you a reference surface, but you need to finish by hand. That was the case here. A router bit couldn’t get into the corner or would leave a round mortise, and I needed a square one.

Cleaning up with a chisel.